Vegan Red Velvet Cake With Macadamia Nut Cookie Crumbs
Prep time
Cook time
Total time
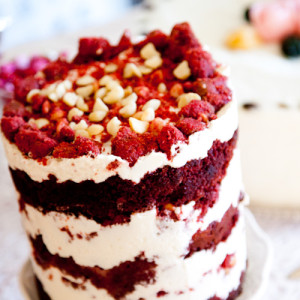
An impressive naked layer caked filled with cream cheese buttercream, red velvet cookie crumbs, macadamia nuts and rich red velvet cake. Perfect for any celebration!
Author: Carrots and Flowers
Recipe type: Dessert
Cuisine: Vegan
Serves: 10-12 slices
Ingredients
Red Velvet Cookie Crumbs
- 1 cup whole wheat pastry flour
- ½ cup organic cane sugar
- 1½ tablespoons brown sugar, tightly packed
- ½ teaspoon baking powder
- 1 heaping tablespoon cocoa
- ½ teaspoon sea salt
- ½ cup macadamia nuts, coarsely chopped
- ¼ cup coconut oil
- 1 tablespoon vanilla extract
- ½ teaspoon white vinegar
- 1 teaspoon vegan red food coloring
Cake Batter
- 2¾ cup whole wheat pastry flour
- 2 cups organic cane sugar
- ¼ cup unsweetened cocoa powder
- 2 teaspoons baking soda
- 1 teaspoon sea salt
- 1¾ cups non-dairy milk (I like almond or cashew)
- 1 cup coconut oil, plus more to grease the pan
- 2 tablespoons vegan red food coloring
- 2 tablespoons white vinegar
Vegan Cream Cheese Frosting
- 8oz vegan cream cheese
- ½ cup vegan shortening
- ½ cup Earth Balance
- 1½ cups organic powdered sugar
- 1 tablespoon vanilla extract
- ½ teaspoon sea salt
- ½ teaspoon lemon juice
- pinch of baking powder
Specialty Equipment
- 6 inch spring form pan
- 2 sheets of Acetate cake strips
Instructions
Red Velvet Cookie Crumbs
- Preheat the oven to 300 degrees and line a baking sheet with parchment paper.
- Combine the flour, sugars, baking powder, salt, nuts, and cocoa in a large stand mixer bowl. Mix on a low setting until even.
- Add the vanilla, vinegar, red coloring, and oil to the dry mixture, stirring constantly. The cookie dough should look crumbly like clumps of sand. If it seems to doughy, add flour by the tablespoon until it looks crumbly.
- Bake at 300 degrees for 11-13 minutes. Let the crumbs cool completely before using them in the cake. They will keep fresh for 1 week at room temperature or 1 month in the fridge or freezer.
Cake Batter
- Heat the oven to 350 degrees. Grease a 9×13 baking pan with a bit of coconut oil, then line the bottom of the pan with parchment paper.
- Combine the flour, sugar, cocoa powder, baking soda, and sea salt in a stand mixer bowl. Use the low setting for 10-20 seconds, until even.
- Keeping the stand mixer on low, slowly add non-dairy milk, oil, and red coloring until just combined. Stop to scrape down the sides of the bowl, then add the vinegar and mix for 10-15 more seconds on low.
Vegan Cream Cheese Frosting
- Cream together the vegan shortening and vegan cream cheese using a stand mixer with a paddle attachment or a hand mixer set to high. Reduce the speed and slowly stream in the remaining ingredients. Turn the speed back up and beat for another 2-3 minutes until the frosting is super fluffy. Will keep up to 5 days in the fridge.
Cake Assembly
- Place two sheets of acetate or laminate into the cake pan as shown. You are creating a tall mold to shape your cake in. Tape the sides of the sheets together to form your sturdy mold. Combine the milk and vanilla extract. This will be your milk soak.
- Using another 6″ cake pan, or the bottom circle of your 6″ spring form pan, trace a circle onto a sheet of wax paper and cut out the circle. Place the wax circle at the bottom of the spring form pan and spray it with cooking oil. (I used coconut oil). Loosen the edges of the cake with a knife, and flip it over onto a sheet a wax paper to remove it from the pan.
- Use a 6″ pan or the bottom of the spring form (before step 4) to cut out two full circles of cake, and two half circles. Once you have your shapes cut out, use the two half circles to line the edges of your spring form mold. You will want to save the full circles for the top layers, they will be prettier.
- Use the remaining scraps to fill in the bottom layer. Shove the pieces into the middle, and tamp it down a bit with the back of your hand. You may have a few bites left over to munch on! Slowly and evenly, pour half of the milk soak on top of the bottom layer. Spread ⅕ of the cream cheese frosting on the layer. Cover the frosting with ⅓ of the cookie crumbles. Spread another ⅕ of the frosting on the crumbles until they are covered, especially around the rim of the cake. It will be visible so you want it to look even and gorgeous!
- Add a full cake circle into the mold, then evenly pour the remaining milk soak onto the cake layer. Spread ⅕ of the frosting on top of the layer, followed by ⅓ of the cookie crumbles and an additional ⅕ of frosting.
- Add the final layer, then cover it with the last ⅕ of frosting. Use the remaining cookie crumbles to decorate your cake in whatever design or fashion you like.
- Cover the finished cake in a few secure layers of plastic wrap and freeze overnight to set the cake. After 4 hours, or ideally overnight, set the cake out to thaw on the counter or in the fridge. An hour or two before serving, remove your cake from the freezer. Pop open the spring form latch to release the cake from the pan, and remove the bottom circle of the pan from the cake.
- Place the cake on your cake stand or cake plate. Peel away the laminate sheets, and VOILÀ, you have a vegan red velvet cake that is whole wheat and animal friendly! Bake one for yourself and more to share with friends and family!
Recipe by Carrots and Flowers at https://www.carrotsandflowers.com/vegan-red-velvet-cake/